CONSTRUCTING A FUCHSIA GARDEN
·
2020 Fuchsia sale ONLY, NO open garden, click Open Fuchsia Garden for more details.
Join us on Facebook http://www.facebook.com/groups/394140627308376/
|
Pages updated Feb 2020. |
Visit the other parts of the garden.
·
Reconstructing the side garden 2013
·
Having moved from the family home that was on almost an acre of land surrounded by bushland and my mother's garden that had filled her life for nearly 30 years I decided I wanted "just a few" fuchsias and a mostly low maintenance garden. I decided to get my ex-neighbour Donna whose job is part time gardening to move all Mum's best loved plants and use them to make a narrow garden down both sides of the backyard so I would have something to look at immediately. So about 80 plants including 8 fuchsias were moved during the winter of 2004, luckily my friend John was renting the house (until he moved across the road) and he was happy to water the garden. I purchased raspberry canes from Victoria and Donna moved the few plants along the back fence and constructed a long narrow raspberry garden along the back fence. So I had a basic garden with a few fuchsias by the time I moved in on 21st August 2004. The whole garden had suffered from several years of tenants so large sections had had to be replanted. What had survived in the front garden was mostly natives and other hardy plants so this theme continued (at first). The exotics were planted down both sides of the driveway and in the new backyard gardens. Then I saw a few more fuchsias and purchased them and planted them under the trees along the drive I saw others but didn't buy them (for a few weeks at least).
The raspberries fruited wonderfully a 2kilo ice cream container full 3-4 times a week but then disaster struck - I discovered I was allergic to the scratches from the thorns, I had huge welts on my arms for weeks. So the raspberries just had to go! What should I put in their place? Taking into consideration the soil was very poor and sandy there was no shade except on winter afternoons when you really don't need it, I decided to have a large fuchsia garden. Now how to go about it, visiting a friend Maureen the solution started to germinate - she had a shade cloth gazebo with the fuchsias growing in the ground. Still, I didn't like that closed in effect so I decided on a shade sail which would hopefully give an open shady area.
April 2005
We decided on a squared off horseshoe shape with a stepping stone path down both sides. A park bench at the back and a fuchsia hedge along both fences.
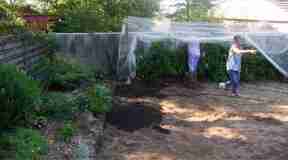
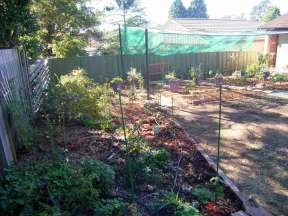
The first shade sale was installed plus an in-ground watering system for the existing garden with provision to extend it to the new garden. Next Donna did all the heavy work I couldn't manage. First the lawn that was very weedy and compacted was dug up. Loads of compost and cow manure was dug in then the watering system was laid out. I purchased a car load of fuchsias in 8 inch pots at a huge discount from a nursery that was only stocking tube stock in future. They hadn't been pruned for some time due to staff shortages so I cut them back heavily and fed them while Donna was preparing the ground. I sorted the plants into upright and trailing and shade and sun loving (using the list I had compiled over the previous few months). Then the fun of planting began. The "weepa hose" for the underground watering system was laid out in long sweeps the correct distance apart so most of the garden was watered. The fuchsia were then planted next to the hose so were definitely getting water. This worked well as we knew that the hose was near the plants when extensions were added later. Each plant was buried about 1" lower than the original soil level. Northern Hemisphere books that deal with hardy fuchsias often recommend planting in spring in a 4 inch deep "saucer" and gradually filling this depression with soil over the summer. This protects the roots from frost. I thought from this that the 1" deeper should protect the roots from both sun and mild frost. As the soil in the big pots was very poor I carefully removed most of it. I then dug a hole larger than the pot and put the soil in a bucket, to this I added slow release fertilizer and water holding crystals at the recommended dose. I used the bucket to backfill the hole so the roots were surrounded with this loose soil. As each section was planted a thick layer of mulch was spread around the plants.
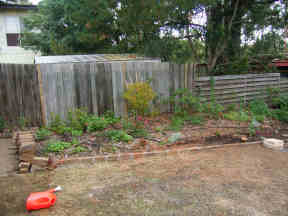
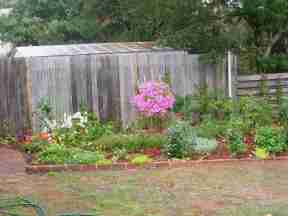
The change in fence type is where the neighbours’ gardens meet - you will be able to pinpoint the position in later photos unless they get completely covered by the fuchsia hedge.
|
|
|
Visit the rest of the garden
o Growing standard and pillar Fuchsias
o Growing Fuchsias in the ground PDF print-friendly version
o Pruning
o Where to buy Fuchsias in Australia
§ Meetings


